
 Bookmark
These Halloween Witch Cookies are a perfect way to bring some spooky fun to your October celebrations. Shaped like tiny witch hats, they combine a classic cookie base with simple decorations that capture the spirit of Halloween without requiring advanced baking skills. They’re ideal for parties, school events, or as a creative weekend project with kids, turning everyday ingredients into festive treats that everyone will enjoy.
I first made these during a family Halloween party and now they are a beloved tradition that the kids eagerly help make every October.
Ingredients
- All purpose flour: One and a half cups for a classic and tender cookie base
- Baking soda: Half a teaspoon for the right rise and texture
- Baking powder: A quarter teaspoon for the right rise and texture
- Salt: A quarter teaspoon to balance sweetness
- Unsalted butter: Half a cup softened to ensure creaminess and richness
- Granulated sugar: Half a cup combined with a quarter cup packed brown sugar for depth and caramel notes
- Brown sugar: Quarter cup packed for depth and caramel notes
- Egg: One large egg to bind everything together and add moisture
- Vanilla extract: One teaspoon to add warmth
- Milk: Two tablespoons to help create a smooth dough
- Chocolate kisses: Twenty four to form the witch hat tips
- Chocolate wafer cookies: Twenty four to serve as the hat bases
- Chocolate frosting: Half a cup to bind and decorate
- Halloween colored sprinkles: To add festive color
- Gel food coloring: Optional to tint frosting for more details and fun
- Notes: Use fresh baking powder and good quality butter for the best texture and flavor
Instructions
- Prepare oven:
- Preheat your oven to 350 degrees Fahrenheit or 175 degrees Celsius and line a baking sheet with parchment paper to prevent sticking and ensure even baking.
- Mix dry ingredients:
- In a medium sized bowl whisk together the all purpose flour baking soda baking powder and salt to distribute the leavening agents evenly.
- Cream butter and sugar:
- In a large bowl beat the softened butter with both granulated sugar and brown sugar for two to three minutes until light and fluffy then add the egg vanilla extract and milk and beat until smooth and fully combined.
- Combine:
- Gradually add the dry ingredients into the wet mixture stirring gently until a cohesive dough forms and avoid overmixing to prevent tough cookies.
- Shape cookies:
- Spoon the dough into tablespoon sized balls and arrange them on the prepared baking sheet spacing them well apart then press each ball down slightly to flatten.
- Bake:
- Bake for nine to eleven minutes until the edges are set and centers look slightly soft then remove and allow the cookies to cool completely before decorating.
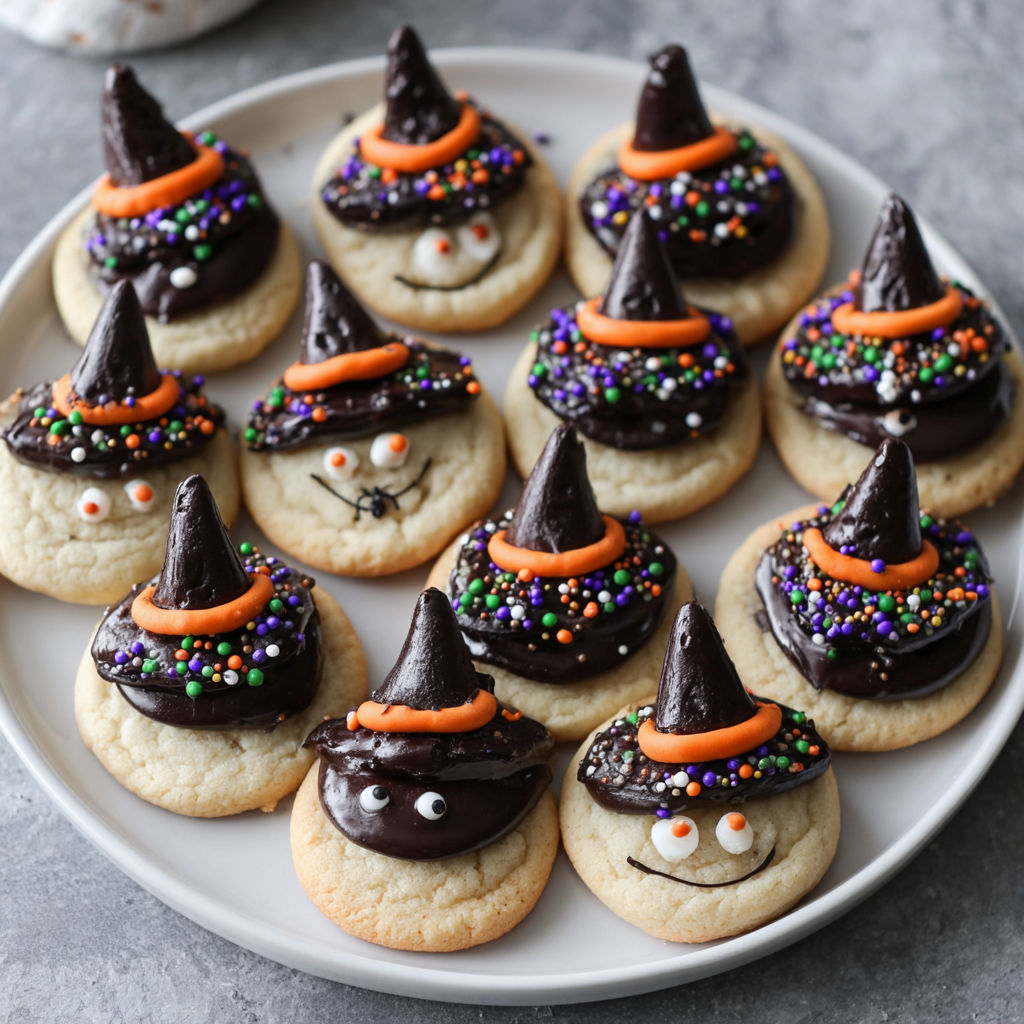
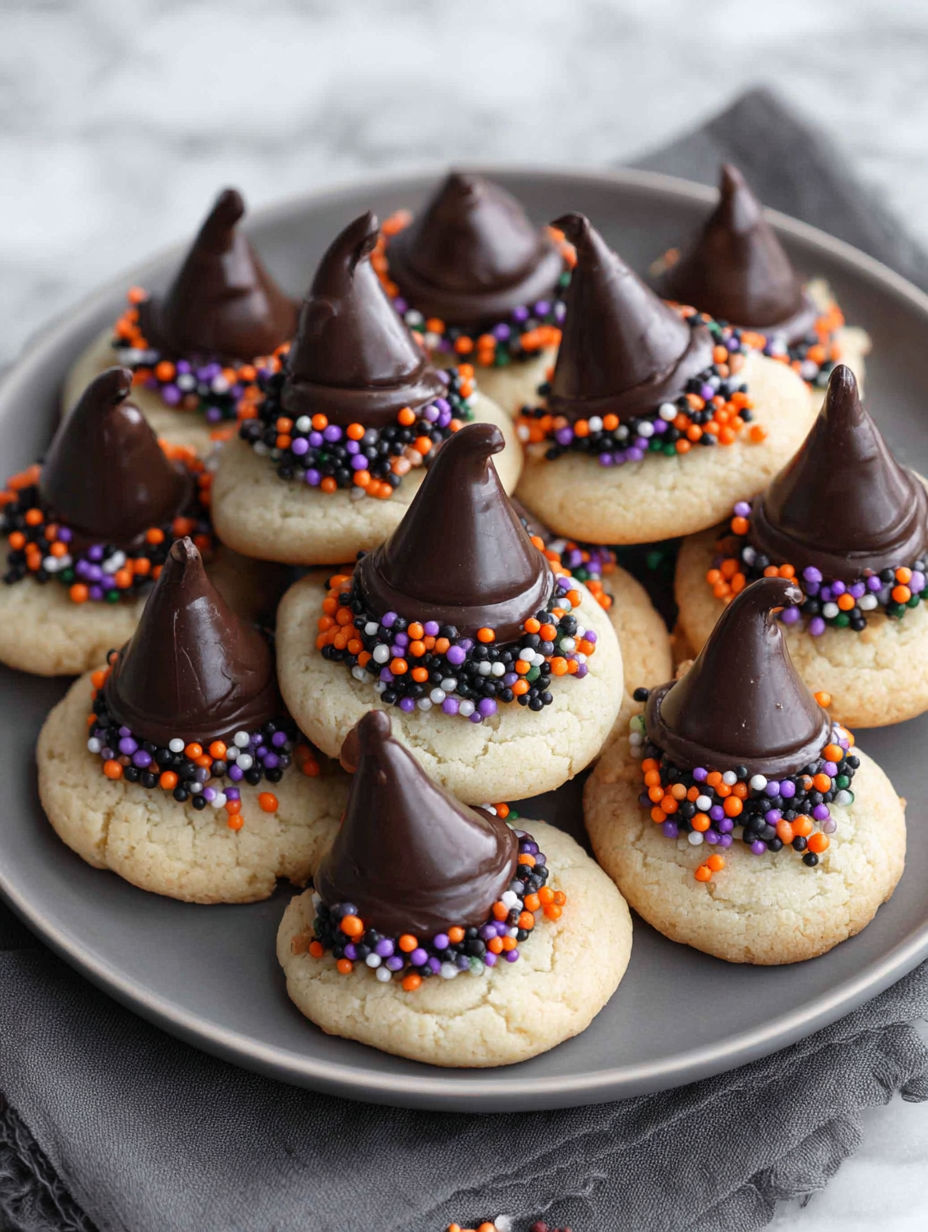
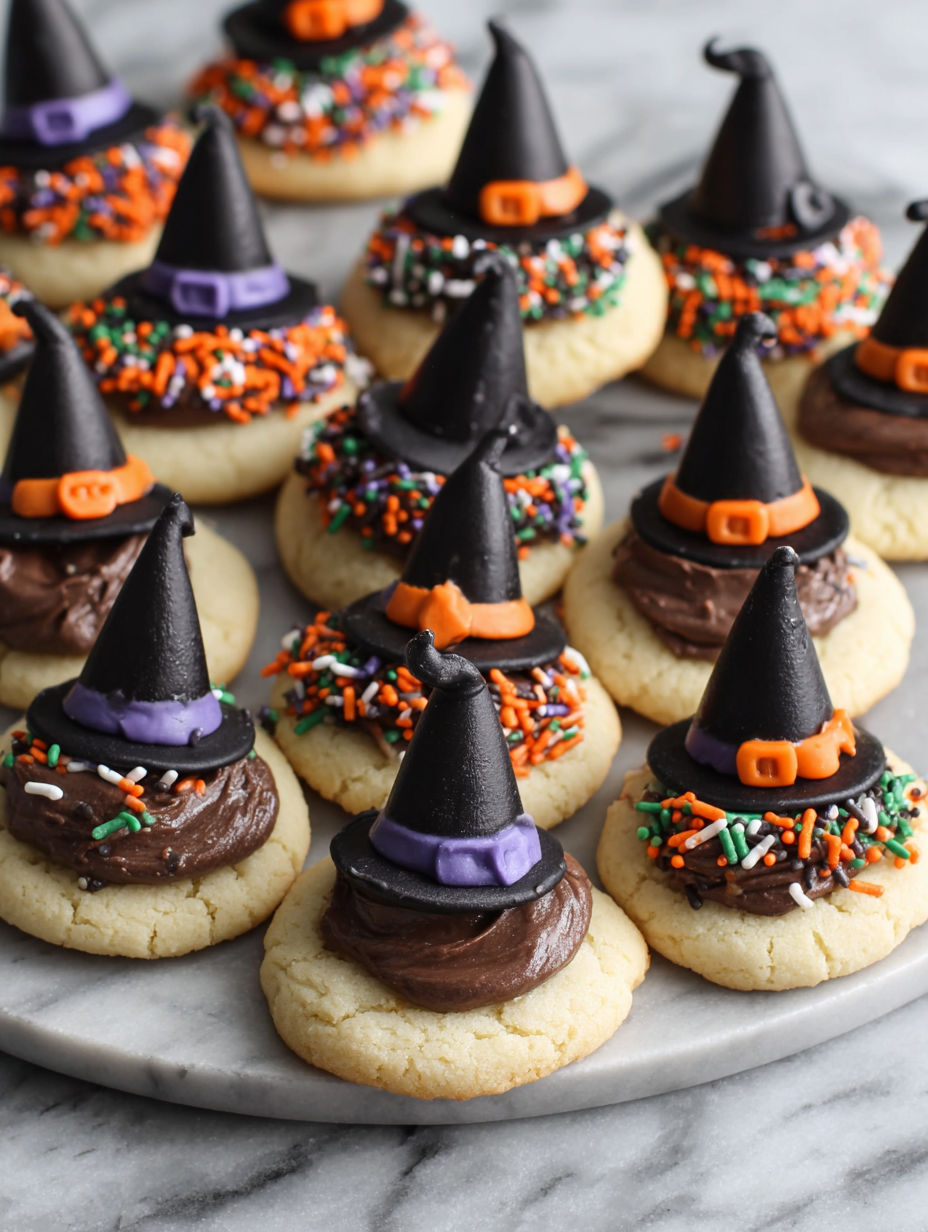
- Prepare hats:
- Spread a small dab of chocolate frosting on top of each cooled cookie and press a round chocolate wafer cookie onto the frosting to form the hat base.
- Attach chocolate kiss:
- Apply a small dot of frosting on the base of each chocolate kiss then press it firmly onto the center of the wafer cookie to form the pointed tip of the witch hat.
- Decorate:
- Using colored frosting pipe a ring around the base of the chocolate kiss to mimic the hat band then sprinkle Halloween colored sprinkles over the frosting.
- Set:
- Allow the decorated cookies to sit at room temperature for about thirty minutes to enable the frosting to firm up and set properly before serving.
My favorite part is piping the frosting bands it’s so satisfying and adds great color contrast. A memorable moment was when my niece decorated an entire batch herself and proudly presented them at her school’s Halloween party.
Storage tips
Store these cookies in an airtight container at room temperature for up to five days to keep them fresh and the frosting intact. To keep them longer freeze the undecorated cookies in a single layer on a baking sheet then transfer to a freezer safe bag for up to three months and thaw and decorate when ready.
Ingredient substitutions
Substitute the chocolate wafer cookies with thin round biscuit cookies or vanilla wafers. Use store bought sugar cookie dough for speed or swap butter with margarine though butter gives the best flavor. For a dairy free option try almond or oat milk instead of regular milk.
Serving suggestions
These witch hat cookies make a great dessert centerpiece for Halloween parties and pair well with hot apple cider or spooky punch. Add gummy worms on the side for extra creepy fun or create a themed cookie platter with other Halloween shapes like pumpkins and ghosts.
These witch hat cookies are a fun and easy Halloween treat to make with kids. Enjoy decorating and sharing them with friends and family.
Your Recipe Questions Answered
- → What type of dough works best for these cookies?
A basic sugar cookie dough works great, but chocolate or store-bought dough can also be used for convenience.
- → How do I create the witch hat look?
After baking and cooling the cookies, spread frosting on top, place a chocolate wafer cookie as the hat base, then attach a chocolate kiss on top for the point.
- → Can kids help with decorating?
Absolutely! Decorating with frosting and sprinkles is simple and fun, making it perfect for children to enjoy.
- → How long should I bake the cookies?
Bake at 350°F (175°C) for 9–11 minutes until the edges are set but the centers remain slightly soft.
- → What are good storage tips for these treats?
Store in an airtight container at room temperature to keep them fresh and maintain frosting texture.