
 Bookmark
Bright spring gatherings call for a treat that excites both kids and adults. These Easter Rice Krispie nests deliver everything you want in a holiday dessert: familiar marshmallow comfort, playful shapes, and a showy finish with green grass frosting and pastel candy eggs. Whether you need something easy to whip up for brunch or a memorable project with young helpers, this recipe nails that happy middle ground of fun and fuss-free.
I started making these with my niece when she insisted that bunnies needed somewhere to hide their eggs. Now it is the dessert everyone grabs first at Easter brunch. There is nothing like laughter around the table as everyone customizes their own nests.
Ingredients
- Fresh marshmallows: Deliver the signature sticky sweetness and are easier to melt than old ones Always squeeze the bag to check for airiness
- Rice Krispie cereal: Gives those classic crisp bites Look for an unopened box and check for freshness
- Unsalted butter: Brings smooth richness and acts as a nonstick agent Quality butter means better flavor and texture
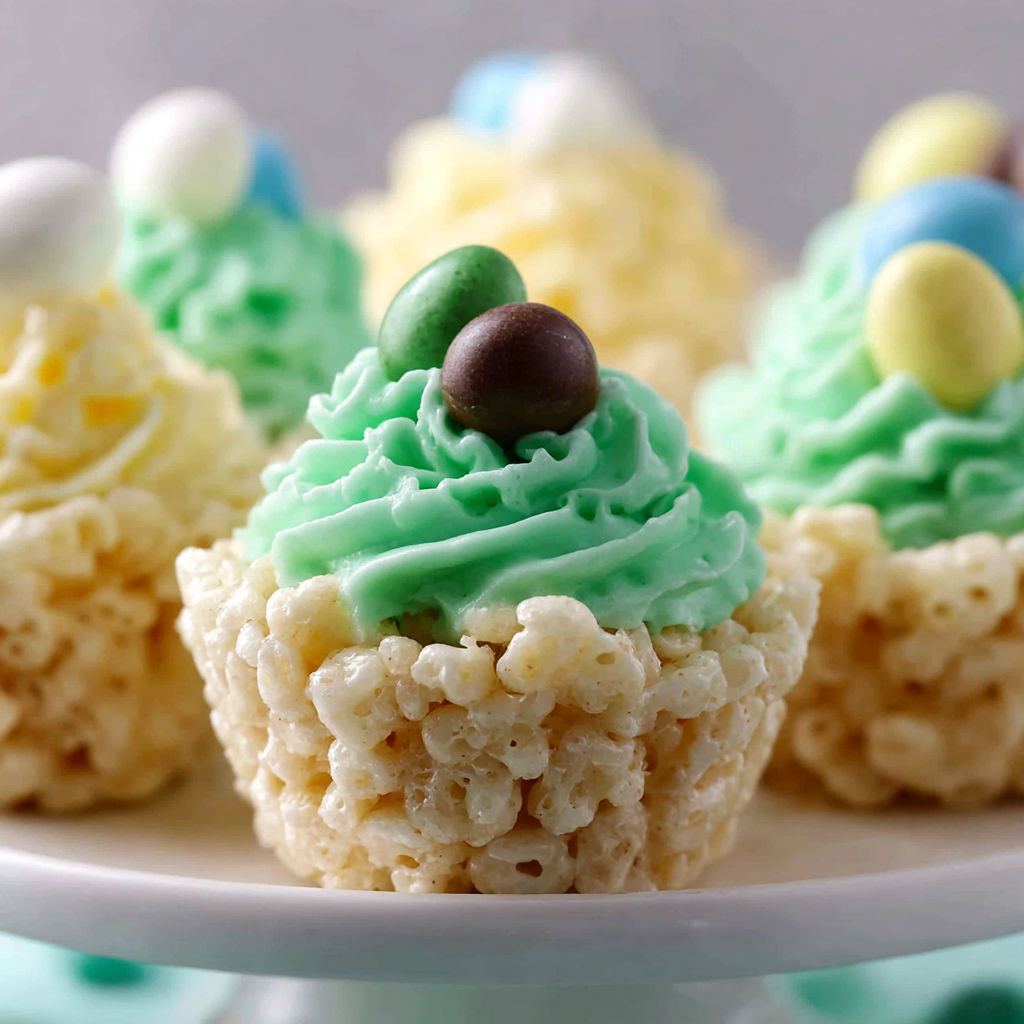
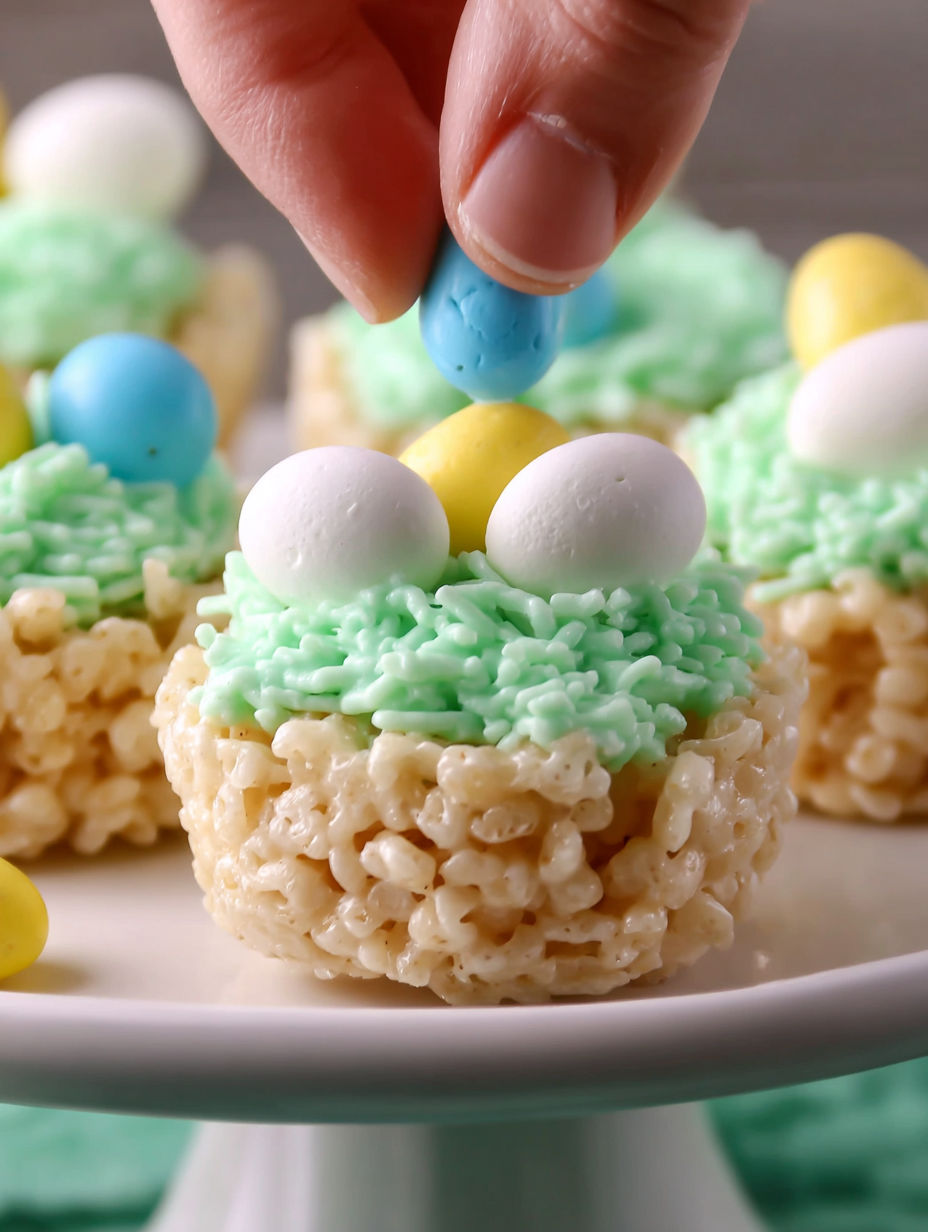
- Mini chocolate eggs or malted speckled eggs: Add eye-catching decoration Opt for brands with shiny vivid pastel coatings
- High-quality butter (for the frosting): Creates a creamy pipeable grass Use European-style if available for flavor
- Powdered sugar: Blends smoothly into butter for a fluffy finish Sift if lumpy for the best results
- Green gel food coloring: Gives concentrated color without watering down the frosting Pick a bright emerald or spring grass shade
Instructions
- Grease the Tins:
- Use a pastry brush or paper towel to coat each cupcake mold in butter or nonstick spray reaching every corner This step makes removal easy and keeps nests from tearing
- Melt the Marshmallows:
- Place the marshmallows and butter into a large heatproof bowl Microwave in 30 second bursts stirring fully after each so the mix is completely smooth and glossy
- Mix In the Cereal:
- Quickly pour the Rice Krispies into the hot mixture Gently but thoroughly fold together to coat every piece and work swiftly since the mix sets fast
- Shape the Nests:
- Spoon equal amounts into each greased cupcake mold To create the nest shape press down in the center using a buttered thumb the back of a measuring spoon or wax paper Push the edges up as you go
- Cool the Nests:
- Allow the shaped nests to set for about 30 minutes at room temperature This step ensures they hold their shape and come out of the pan cleanly
- Make the Buttercream:
- Beat the butter until creamy and pale Slowly add sifted powdered sugar then splash in food coloring Beat until you have a thick vivid green grasslike consistency that pipes easily
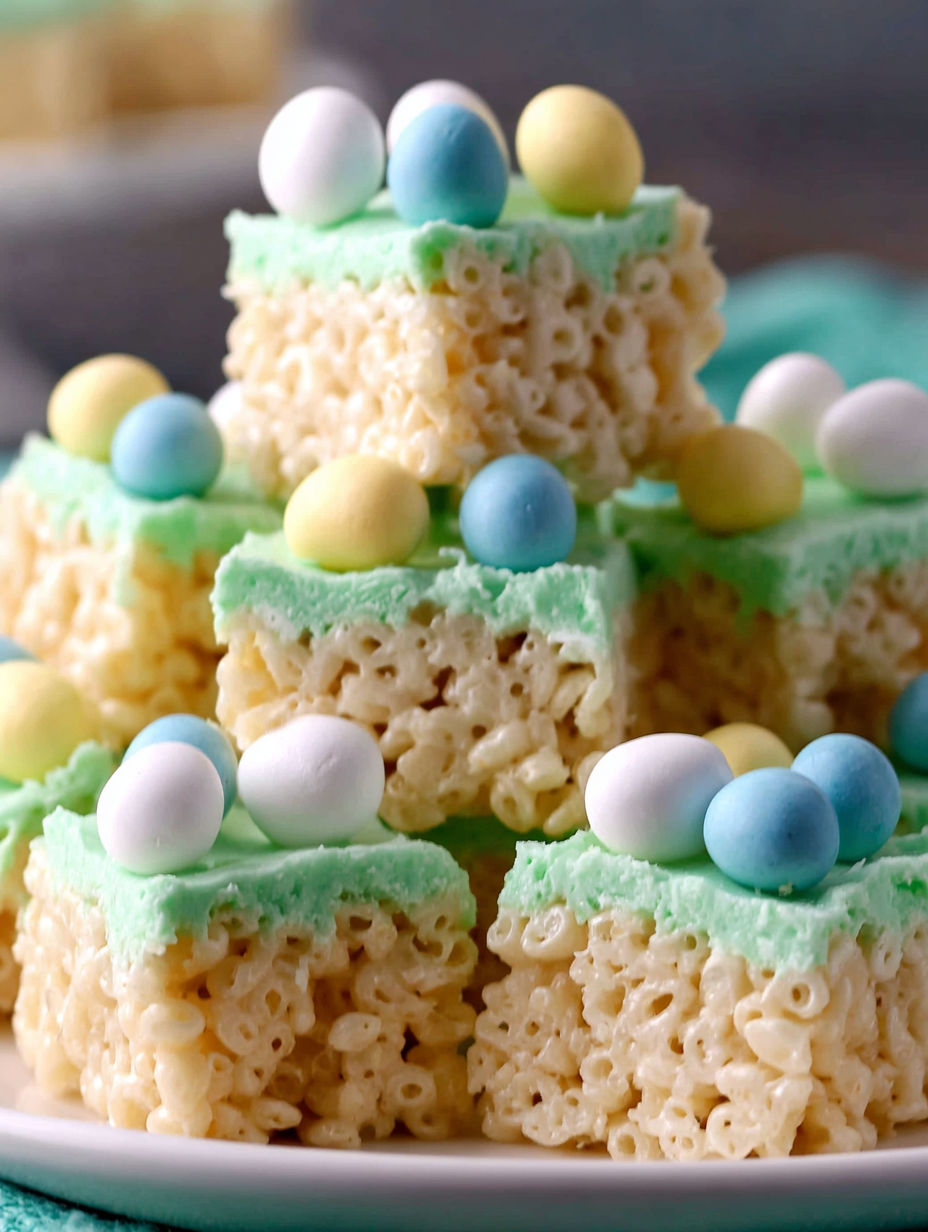
- Frost and Decorate:
- Pipe the green buttercream onto each cooled nest piling up grassy peaks Place candy eggs on top while the frosting is still soft so they stick gently in place
The thing I love most is mixing up different candy eggs for each nest Sometimes I will sneak in a special golden one for a prize or let everyone pick favorites For me the real memory is seeing sticky little fingers working with pride and smiles
Storage Tips
Once decorated keep these at room temperature away from sunlight or heat Store in a single layer in airtight containers to maintain crispness Two to three days is their sweet spot before they risk getting dry Undecorated nests can be made ahead and topped with frosting right before serving which keeps colors and candy vibrant
Ingredient Substitutions
For the Krispie base try cocoa cereal for a chocolate twist or fruity cereal for extra color Marshmallows can be swapped for vegan versions if needed Sub ready-made vanilla frosting for homemade buttercream when pressed for time or swap in natural powdered colors if you avoid dyes
Serving Suggestions
Lay the nests out on a pretty cake stand with flowers scatter jelly beans or edible grass around for an instant centerpiece Or wrap them individually in cellophane with colorful ribbon for gifts I have used them as Easter brunch place cards by tucking a tiny paper name flag in each nest
Cultural Notes
Rice Krispie treats first came to fame in American kitchens before World War II and evolved as holiday go-tos Each Easter season we see families across generations doing their own version of these nests Carrying that tradition into my home every spring truly feels special
Seasonal Adaptations
Try pumpkin spice in autumn or peppermint extract at winter holidays Use red and green decorations for Christmas or pastel sprinkles for spring birthdays The basic method adapts easily to whatever is in season or on hand
Success Stories
Every year friends ask for these at our potluck They tell me their kids love helping decorate and that the treats disappear fast Long after the last brunch plate is cleared we are still retelling stories about who made the most creative nest or hid a secret candy
Freezer Meal Conversion
These are best enjoyed fresh at room temp but you can freeze plain shaped nests in a zip-top bag for up to one month Thaw fully and decorate right before using to avoid sogginess The frosting does not freeze well but the base holds up fine
What I cherish most are the years when both kids and adults end up covered in frosting and laughter Everyone leaves with a treat and a memory and usually demands a repeat next Easter
Your Recipe Questions Answered
- → How far ahead can I make Krispie nests?
Prepare nests 1–2 days in advance and store in an airtight container at room temperature. Decorate just before serving for freshness.
- → How do I prevent the nests from becoming hard?
Use fresh marshmallows, melt gently, and avoid compacting the mixture in the tin too tightly. Light pressure ensures a tender texture.
- → Can I use store-bought frosting for the grass?
Yes! Use pre-made vanilla frosting tinted with green food coloring for an easy, time-saving decoration option.
- → What candy alternatives work for decorating?
Try jelly beans, pastel M&Ms, Cadbury eggs, or small Jordan almonds for creative, egg-like toppings.
- → What’s the best way to shape the nests?
Shape while warm, pressing with a greased spoon, waxed paper, or your thumb for a clean nest depression in each mold.
- → Any extra flavoring tips?
Add a pinch of salt or citrus zest to the base, or brown the butter for a more complex flavor profile.