
 Bookmark
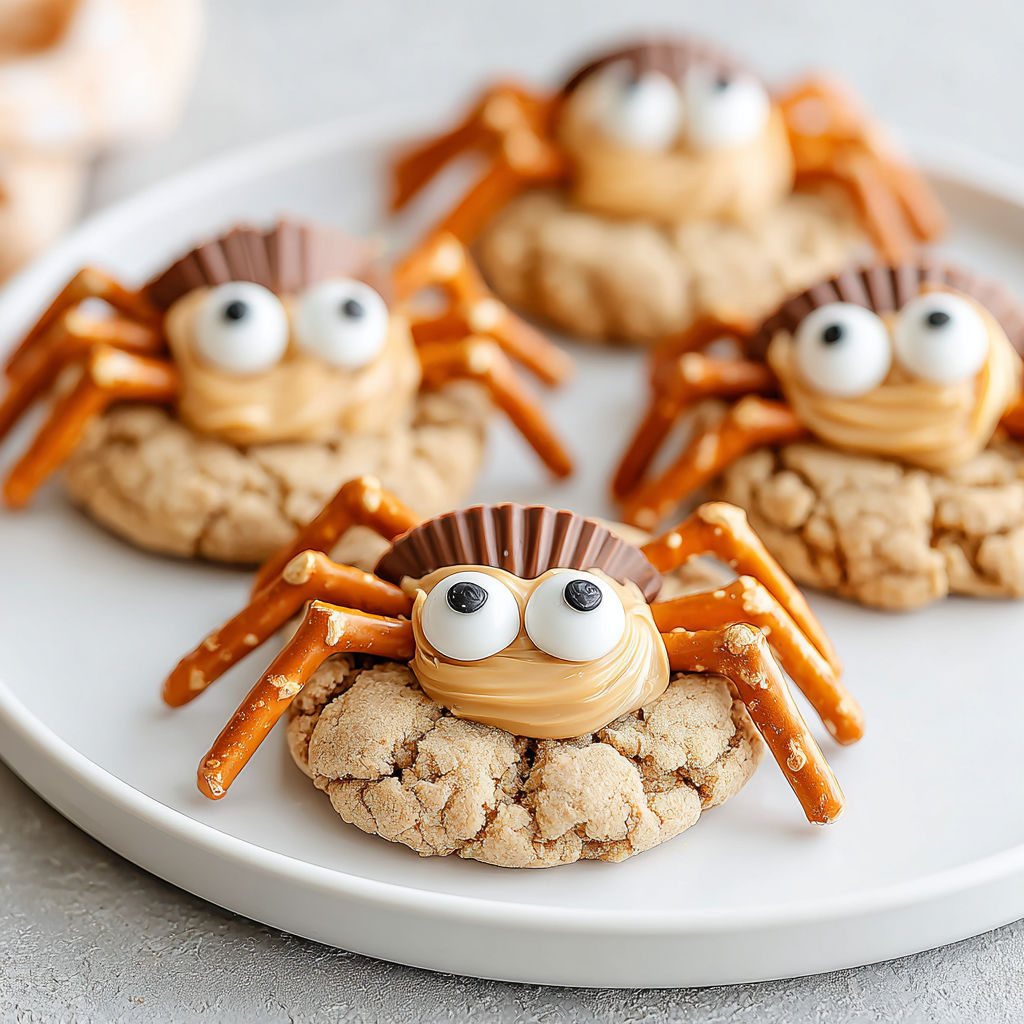
These peanut butter spider cookies bring playful festivity to any Halloween party or kids’ birthday celebration. With a sweet peanut butter cookie base and miniature peanut butter cup bodies, complete with pretzel stick legs, these treats are both delicious and fun to make. They evoke nostalgic moments from my childhood when trading candy and candythemed baking adventures meant the world on Halloween night.
I first made these cookies for a Halloween party and watched the kids’ eyes light up as they recognized the spider shapes. The blend of sweet, salty, and crunchy hits just the right spot every time.
Ingredients
- Unsalted butter: Half a cup softened for a creamy dough base
- Granulated sugar: Half a cup to add sweetness and crispness to the cookies
- Brown sugar: Half a cup packed offering moisture and a subtle molasses flavor
- Egg: One large to help bind ingredients and create structure
- Creamy peanut butter: Three quarters cup for that signature nutty flavor and soft texture
- Pure vanilla extract: One teaspoon enhances overall flavor depth
- Allpurpose flour: One and a half cups providing structure and chew
- Baking soda: Half a teaspoon makes the cookies rise just enough for a tender crumb
- Salt: Quarter teaspoon balances the sweetness and enhances flavors
- Pretzel sticks: One bag for crunchy spider legs offering contrast in texture
- Miniature peanut butter cups: One bag to serve as the spider bodies adding extra peanut butter goodness and a fun visual element
Instructions
- Cream Butter and Sugars:
- Beat the softened butter with both sugars on medium speed for about two minutes until light and fluffy. This step adds air to your dough making your cookies tender. Remember to scrape down the bowl occasionally to ensure even mixing.
- Incorporate Egg Peanut Butter and Vanilla:
- Add the egg peanut butter and vanilla extract into the bowl. Beat everything together until the mixture is smooth and no streaks remain. A fully combined batter is important for even texture.
- Mix Dry Ingredients Separately:
- In a different bowl sift the flour baking soda and salt together. Sifting prevents lumps and ensures the rising agent is evenly distributed resulting in consistent cookie texture.
- Combine Wet and Dry Ingredients:
- Gradually add the dry flour mixture into the wet peanut butter mixture using low speed. Mix only until just combined. Over mixing will yield tough cookies.
- Shape and Bake Cookies:
- Preheat your oven to 350°F (177°C). Line a baking sheet with parchment paper. Scoop tablespoonsized portions of dough and roll them into balls placing them two inches apart to allow spreading without merging. Bake for 10 to 11 minutes until edges are set but the centers still look slightly underbaked. Cookies will continue to firm up as they cool.
- Cool and Prepare for Decorating:
- Let the cookies rest on the baking sheet for five minutes to firm up. Then transfer them to a wire rack to cool completely. This ensures they hold shape when decorated.
- Assemble Spider Cookies:
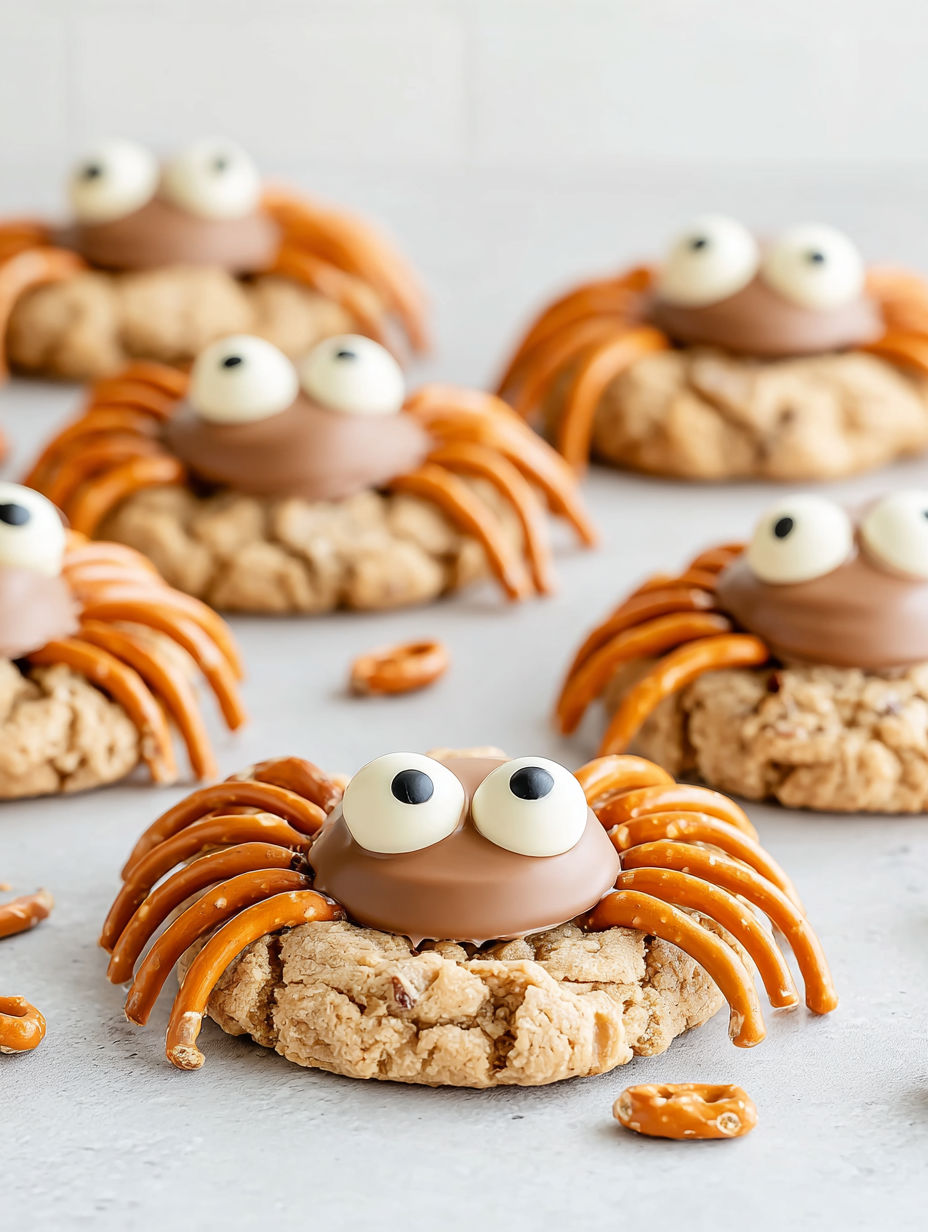
- While the cookies are still barely warm press a miniature peanut butter cup gently into the center of each cookie for the spider’s body. Break pretzel sticks into thirds and insert three to four pieces on each side to form spider legs. For extra fun add candy eyes with a dab of melted chocolate or icing to give your spiders personality.
Peanut butter is my favorite ingredient here because it adds richness and moistness unlike any other nut butter. One Halloween our whole family gathered in the kitchen with flour-dusted countertops crafting batch after batch of these spiders sharing laughs and spooky stories which made these cookies even sweeter.
Storage Tips
Store baked cookies in an airtight container at room temperature for up to three days to keep them soft. If you want to save them longer freeze undecorated cookies in a sealed freezer bag for up to two months. Thaw completely before assembling the spiders for best results.
Ingredient Substitutions
Try refined coconut oil instead of butter for a dairyfree option that keeps cookies chewy and fragrant. Swap miniature peanut butter cups with chocolate truffles for a gooier richer spider body. Pretzel sticks can be replaced with thin black licorice ropes if you want an extra spooky look and a chewy leg texture.
Serving Suggestions
Add a pinch of cinnamon or nutmeg to the dough during mixing to bring a warm autumn flair. Serve these cookies with hot chocolate or spiced cider for a cozy seasonal pairing. For kids’ parties swap the peanut butter cups with colorful candies to customize and brighten the look.

These playful cookies are perfect for spooky gatherings and sure to delight kids and adults alike. Enjoy making them with family for a fun hands-on activity.
Your Recipe Questions Answered
- → Why do my cookies spread too much?
Using warm baking sheets or over-creaming butter can cause spreading. Chill shaped dough before baking to reduce spread.
- → How can I keep the spider legs from breaking or falling out?
Insert pretzel sticks while cookies are warm but firm. Avoid pressing too hard and consider making small holes first.
- → Can I prepare the cookies ahead of time?
Yes, bake cookies up to 2 days early and store airtight. Assemble the pretzel legs and peanut butter cups on serving day.
- → Is freezing the dough or cookies possible?
Cookie dough may be frozen as balls for up to 2 months. Bake from frozen with slightly increased time. Decorated cookies freeze best undecorated.
- → What substitutions work well for ingredients?
Refined coconut oil can replace butter for a dairy-free option; chocolate truffles can substitute mini peanut butter cups for the spider body.
- → How do I ensure even cookie size for easy assembly?
Use a cookie scoop to portion dough evenly, ensuring uniform baking and adequate space for pretzel legs.