
 Bookmark
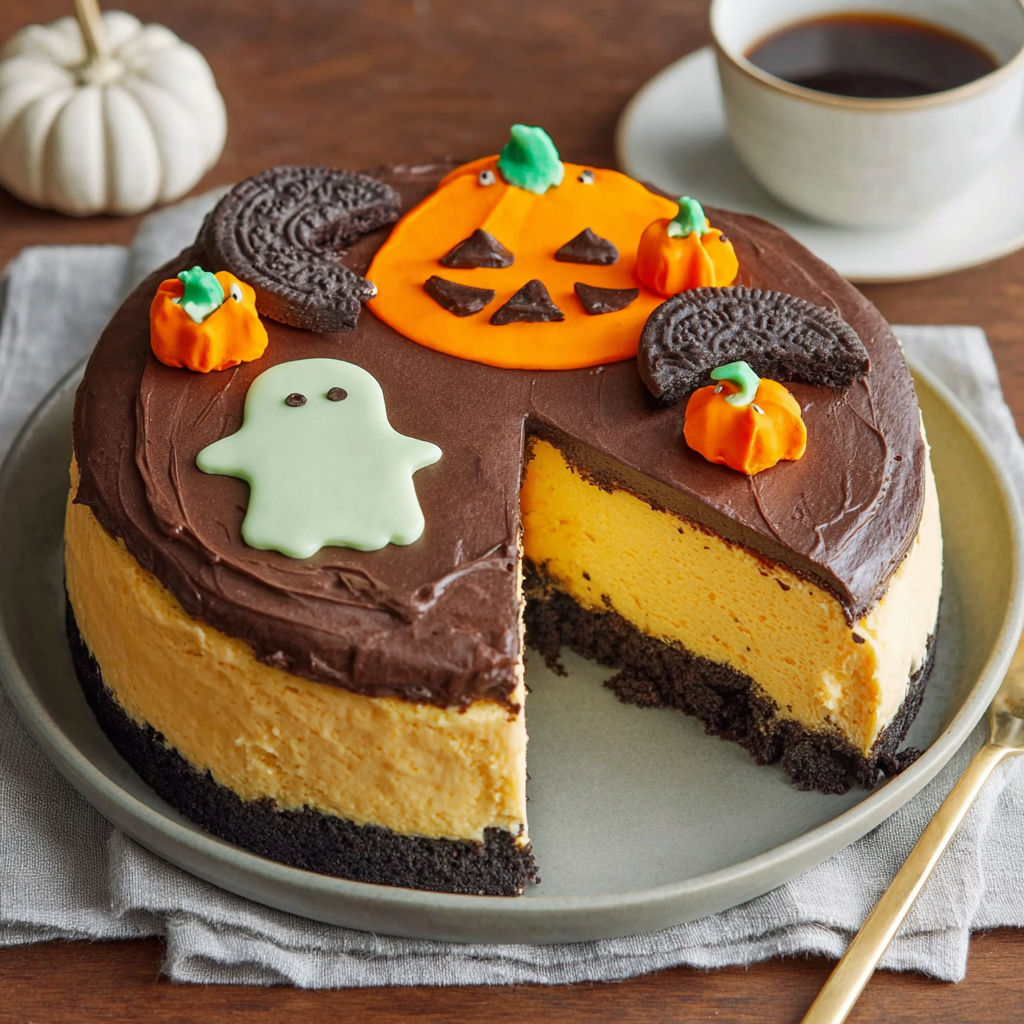
This nobake pumpkin cheesecake with a jacko'lantern brownie grin is the perfect dessert for spooky season gatherings. The rich chocolate brownie base pairs beautifully with the creamy pumpkin cheesecake layer creating a festive and indulgent treat that looks almost too fun to eat.
My family and I first tried this during a Halloween party and it instantly became a hallmark dessert we bring out every year. Kids love the pumpkin face while adults appreciate the balanced sweetness and rich chocolate notes.
Ingredients
- Allpurpose flour: for structure use the spoon and level technique to avoid dense brownies
- Unsweetened cocoa powder: adds deep chocolate flavor choose a quality Dutch processed variety if possible
- Fine salt: enhances overall flavor balance so don't skip it
- Unsalted butter: provides richness opt for fresh and unsalted for best results
- Semisweet chocolate: melts smoothly enriching the brownie base select good quality chocolate with at least 50 percent cacao
- Granulated sugar: sweetens the batter to balance the cocoa bitterness
- Large eggs: bind the batter and help with texture always use room temperature eggs for even mixing
- Bittersweet chocolate chips: on top melt slightly creating a glossy finish add a good snap to the dessert
- Unflavored powdered gelatin: helps the cheesecake set firmly without baking soften in water before use
- Cream cheese: offers creaminess bring to room temperature to avoid lumps
- Pure pumpkin puree: adds seasonal flavor and moisture choose unsweetened and well drained for best texture
- Confectioners' sugar: sweetens and smooths the cheesecake layer sift beforehand if clumpy
- Sour cream: adds tang and silkiness use full fat for best richness
- Vanilla extract: enhances overall flavor pick pure extract for depth
- Fine salt: balances sweetness and highlights flavor
- Storebought vanilla frosting: is used for the pumpkin vine detail select a creamy brand for easy piping
- Green gel food coloring: delivers a vibrant vine hue use sparingly to avoid overpowering color
- Semisweet chocolate square: for the pumpkin stem provides a neat finishing touch pick a firm square that can stand upright
Instructions
- Sauté the Aromatics:
- Not applicable for this recipe
- Prepare the Brownie Base:
- Preheat your oven to 350 degrees Fahrenheit. Line a 10by15inch baking dish with foil leaving a twoinch overhang on two sides and coat the foil with nonstick cooking spray to ensure easy removal. Whisk together the allpurpose flour cocoa powder and fine salt in a medium bowl for even distribution. Melt the unsalted butter together with the semisweet chocolate in a saucepan over medium heat stirring frequently until completely smooth then let it cool for about ten minutes to avoid scrambling the eggs. Stir in the granulated sugar and then the slightly beaten eggs mixing thoroughly to combine. Incorporate the flour mixture in two batches folding gently until just mixed. Pour the batter into the prepared pan spreading it evenly. Bake for 20 to 25 minutes until a toothpick comes out with only a few moist crumbs. Remove from oven and evenly sprinkle the bittersweet chocolate chips over the hot brownie allowing them to soften for five minutes. Use an offset spatula to gently spread the melted chocolate chips over the surface creating a smooth coating. Cool the brownie completely on a rack for about one hour then refrigerate until the chocolate topping sets about 30 minutes.
- Cut and Assemble the Brownie Base:
- Lightly coat a 16inch parchment sheet with nonstick spray. Place the brownie chocolate side down on the paper this prevents cracking when cutting. Trace the bottom of a nineinch springform pan on one half of the brownie using a sharp paring knife and cut out the circle carefully. Fit this circle chocolate side up in the bottom of the springform pan and lock the side. From the remaining half of the brownie cut out shapes for the jacko'lantern’s eyes by making two 2.5inch equilateral triangles. Cut one 2inch triangle for the pumpkin nose and a fiveinch wide half moon for the mouth. Add teeth by cutting small offset segments from the mouth. If chocolate cracks during cutting warm an offset spatula and gently smooth out breaks.
- Prepare the Pumpkin Cheesecake Filling:
- Soften the unflavored powdered gelatin by combining it with onequarter cup water in a small microwave safe bowl and let it sit for five minutes. In a food processor combine room temperature cream cheese pure pumpkin puree confectioners' sugar sour cream vanilla extract and fine salt. Process until the mixture is entirely smooth. Microwave the softened gelatin in thirty second increments stirring until fully melted usually about thirty seconds. Add the melted gelatin to the food processor and blend for about thirty seconds to fully incorporate.
- Assemble and Chill the Cheesecake:
- Pour the pumpkin cheesecake batter over the brownie base in the springform pan spreading it evenly with a spatula. Press the brownie cutouts of eyes nose and mouth gently into the batter so they are flush with the surface avoiding any batter on top of the shapes to keep the design clean. Refrigerate the assembled cake until completely set which takes at least four hours but preferably overnight to develop the flavors and firmness.
- Decorate with Pumpkin Vine and Stem:
- Mix the storebought vanilla frosting with green gel food coloring in a small bowl until an appealing pumpkin vine shade is achieved usually one to two drops. Transfer the colored frosting to a pastry bag fitted with a small round tip and pipe a curly vine design along the top edge of the cheesecake surrounding the jacko'lantern face. Finally push the square of semisweet chocolate into the top side of the cheesecake about onequarter inch in to mimic the pumpkin stem completing the festive look.
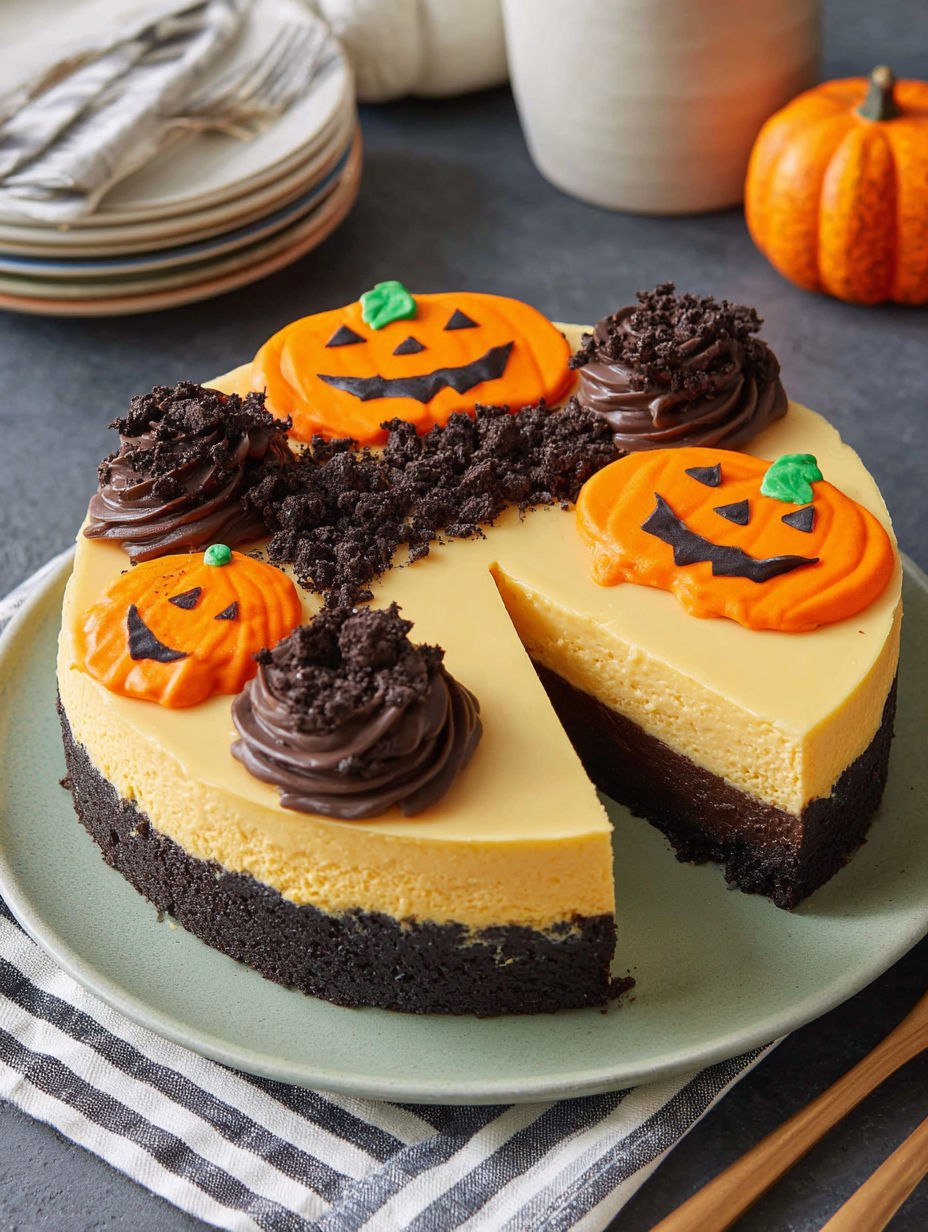
My favorite part of this recipe is the brownie cutouts that form the jacko'lantern face before chilling. It brings an interactive element as the kids love choosing where their eyes go and helping with placement. This detail became a tradition in my family making every Halloween extra special.
Storage Tips
Store any leftover cheesecake covered tightly with plastic wrap or in an airtight container in the refrigerator for up to four days. The flavors intensify when chilled longer. Avoid freezing as the texture of the cheesecake may become watery after thawing.
Ingredient Substitutions
If you do not have bittersweet chocolate chips substitute with good quality semisweet chips to keep the chocolate flavor balanced. For pumpkin puree you can use fresh pureed roasted pumpkin but ensure it is well drained to avoid excess moisture. To make it vegan swap cream cheese and sour cream for coconut based alternatives and replace gelatin with agar agar powder set according to package directions.
Serving Suggestions
Serve slices with a dollop of whipped cream or a sprinkle of cinnamon for extra warmth. It also pairs well with a drizzle of salted caramel sauce or a side of roasted pecans for texture contrast. This dessert is a show stopper perfect for Halloween parties or autumn gatherings.
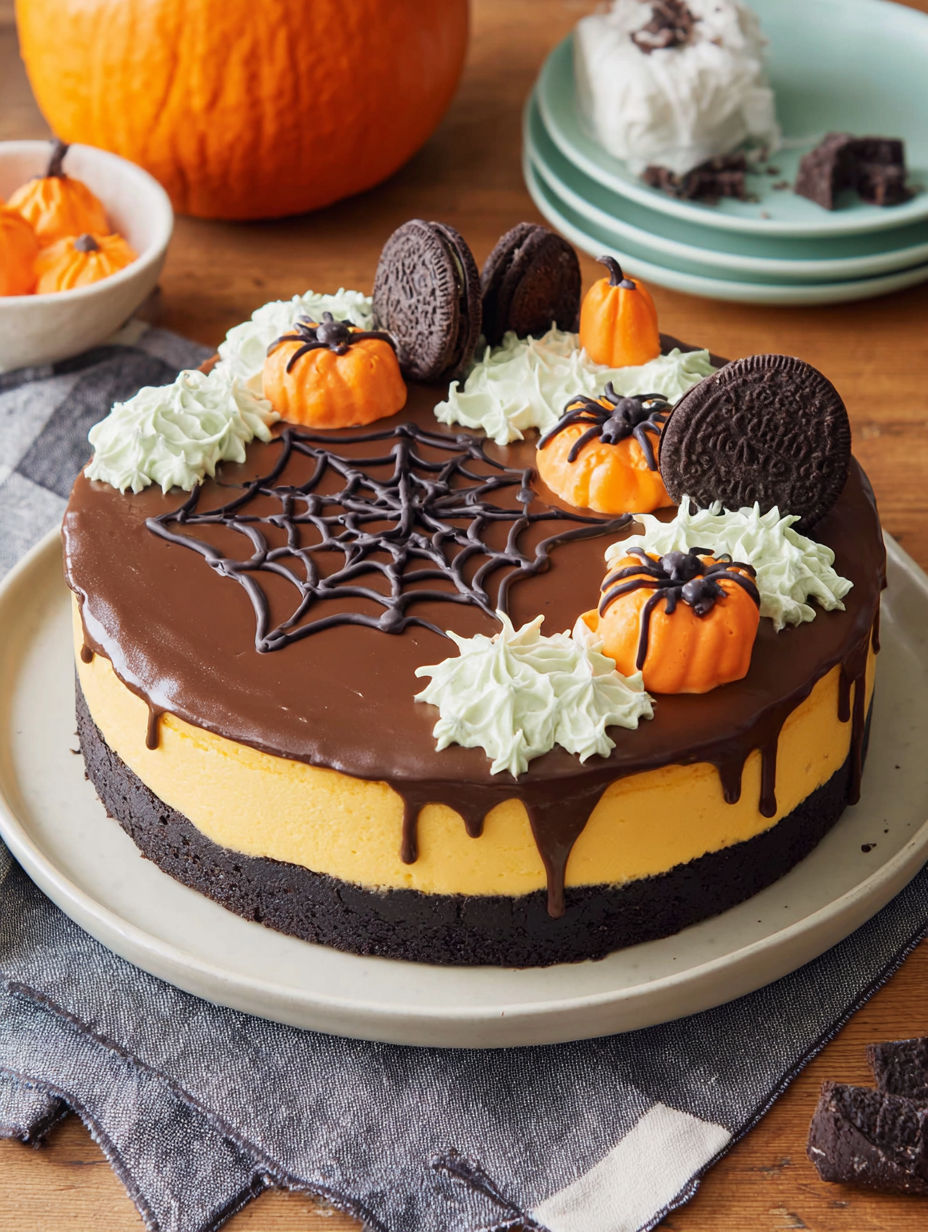
This festive cheesecake combines creamy pumpkin filling with a rich brownie base for a playful Halloween centerpiece. Chill overnight for best texture and easier slicing.
Your Recipe Questions Answered
- → How do I prevent the brownie chocolate coating from cracking when cutting?
Lightly coat parchment paper with cooking spray and place the brownie chocolate-side down on it before cutting. Use a hot, dry offset spatula to smooth any cracks if needed.
- → What is the best way to soften gelatin for the filling?
Soften the gelatin by combining it with 1/4 cup water and letting it sit for 5 minutes before microwaving for about 30 seconds until melted.
- → How can I achieve the pumpkin vine color for the frosting decoration?
Mix store-bought vanilla frosting with 1 to 2 drops of green gel food coloring until it resembles a pumpkin vine shade.
- → Is it necessary to chill the cheesecake overnight?
Chilling for at least 4 hours sets the filling properly, but refrigerating overnight enhances texture and flavor.
- → Can I prepare the brownie base in advance?
Yes, bake the brownie base ahead of time and refrigerate until ready to assemble the layers.