
 Bookmark
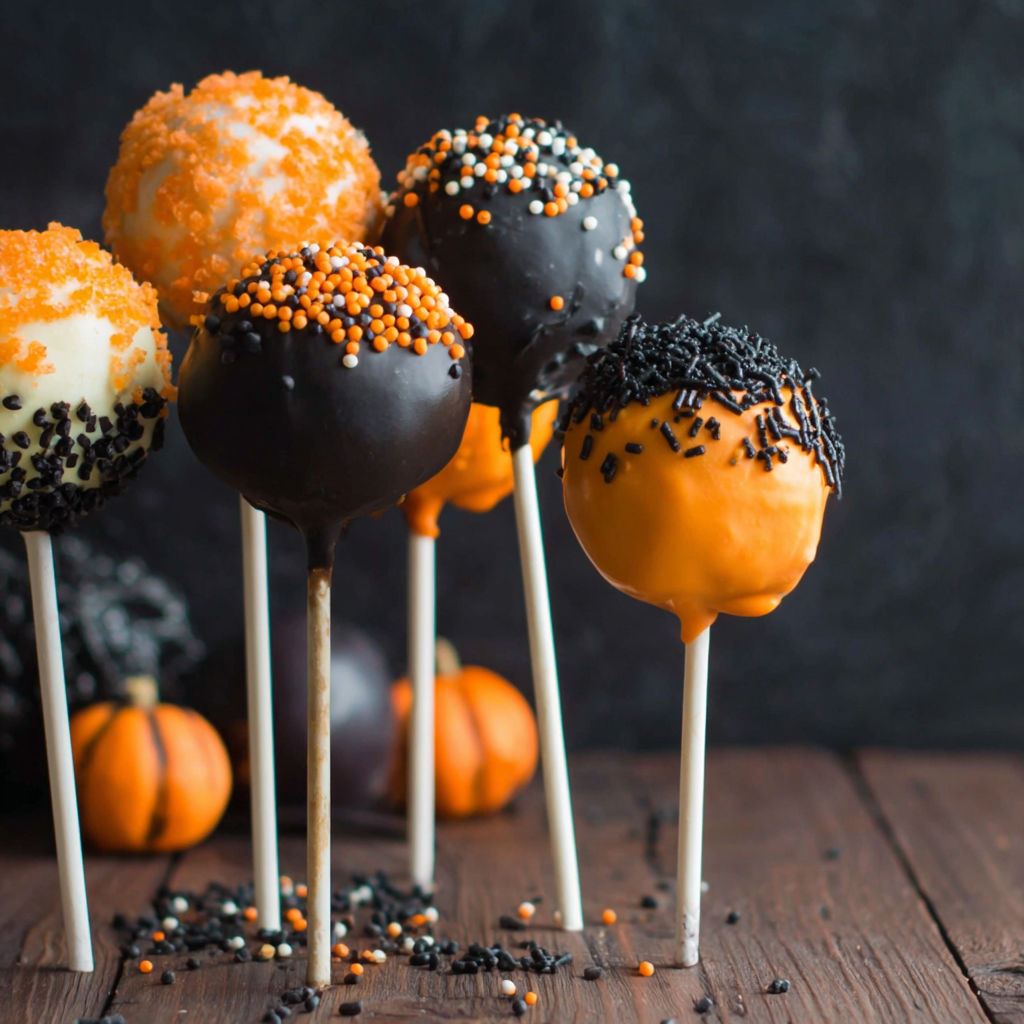
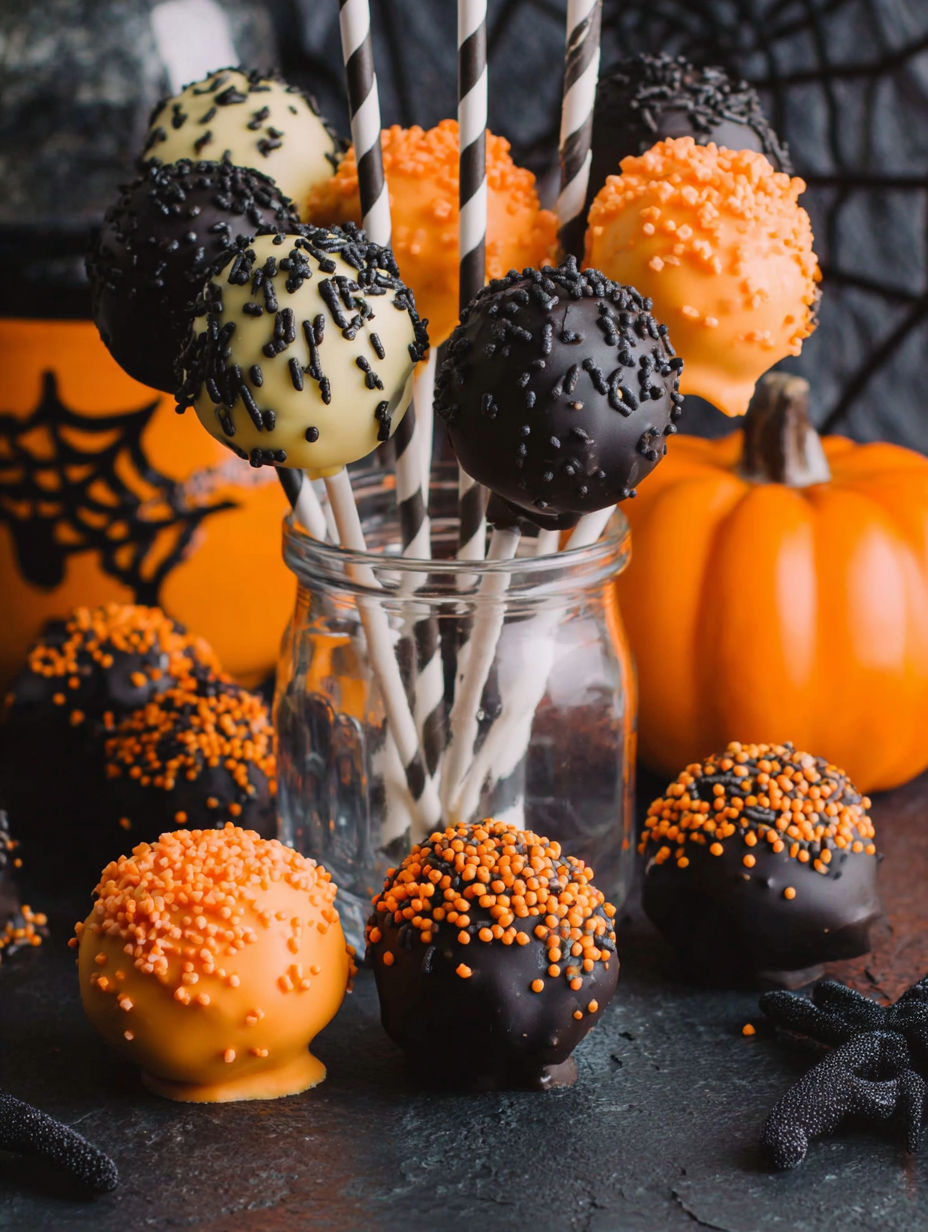
These Halloween cake pops bring festive fun to your party table with their bright colors and spooky designs. Perfect for celebrating the season, they combine moist cake with creamy frosting and a crisp candy coating for a treat that looks as good as it tastes.
I first made these for a Halloween gathering, and everyone loved how adorable and tasty they were. Now they are a musthave on my fall dessert list each year.
Ingredients
- One 15.25ounce box yellow cake mix: provides a buttery base, pick a quality brand for best flavor
- Vanilla frosting: binds the cake crumbs, choose creamy and flavorful for nice texture
- Orange candy melting wafers: create the smooth bright coating, opt for high quality to avoid clumping
- Jumbo black nonpareils: make spooky eyes, choose fresh for crisp texture
- Black candy melting wafers: used for the dark coating and details, pick smooth melting ones
- Black sanding sugar: adds sparkle and texture, look for vibrant color
- Small orange nonpareils: add fun contrast on black pops, fresh ones work best
- 46 lollipop sticks: sturdy and foodgrade, about 6 inches long to hold the cake balls
- Two 9.8by11.8inch Styrofoam blocks: to hold pops upright while drying
- Small piping bag: for precise decoration work
Instructions
- Prepare the Cake:
- Bake the cake in a 9by13inch pan following package directions until fully done. Let it cool completely to avoid soggy cake pops.
- Form Cake Mixture:
- Break the cooled cake into crumbs and pulse with frosting in a food processor until it forms a smooth ball that pulls away from the bowl edges. Add frosting slowly if needed so it holds shape.
- Shape Cake Balls:
- Using a 3/4ounce scoop, make about 46 evenly sized balls. Place them on parchment paper and refrigerate for 30 minutes so they firm up.
- Attach Sticks:
- Melt orange candy wafers in the microwave as directed until smooth. Dip the tip of each lollipop stick halfway into the melted candy then insert each stick halfway into a cake ball to secure. Refrigerate pops for one hour to chill completely.
- Coat and Decorate:
- Half of the cake pops are dipped in the melted orange candy and left to set. While coating is still wet, add jumbo black nonpareils near the top to create spider eyes and place them upright in Styrofoam to harden.
- Coat Remaining Pops:
- Coat the remaining pops in melted black candy wafers and decorate half with black sanding sugar for sparkle. On the others, add small orange nonpareils for contrast. Place these pops in a separate Styrofoam block to set.
- Add Details:
- Melt black candy wafers again if needed and pour into a piping bag with a small tip. Pipe spider bodies behind black nonpareil eyes and add four legs on each side for spooky spiders. Let the decorated pops set fully in the foam block.
- Make Spider Web Pops:
- Pipe zigzag black candy lines over any plain orange dipped cake pop held above parchment paper, then sprinkle black sanding sugar while still wet. Return these to the foam block to dry completely.
I love the orange candy coating the most because it brings that perfect bright spooky vibe. One Halloween, my kids and I spent the afternoon decorating together, and the spider cake pops were the biggest hit with their friends.
Storage Tips
Store baked cake balls in an airtight container in the refrigerator if not coating immediately. Once coated and dried, keep cake pops in a single layer in a cool place but avoid humidity to keep coatings crisp.
Ingredient Substitutions
You can swap vanilla frosting with cream cheese frosting for a tangier flavor. Candy melting wafers can be replaced with highquality colored chocolate melts, but temper carefully to maintain smooth texture.
Serving Suggestions
Arrange cake pops on a decorative platter with themed napkins for a party display. Pair with warm apple cider or hot chocolate to complete a cozy Halloween treat table.

These Halloween cake pops are a festive treat that are as fun to make as they are to serve. Enjoy creating spooky designs with family and friends.
Your Recipe Questions Answered
- → What kind of cake mix is best for these pops?
A yellow cake mix provides a light, sweet base that pairs perfectly with vanilla frosting and vibrant coatings.
- → How do I get the cake mixture to hold shape?
Mixing the cake crumbs with enough vanilla frosting until it forms a firm ball helps it hold shape when chilled.
- → Can I use different candy melts for coating?
Yes, orange and black candy melts create the festive colors, but you can experiment with other colors as desired.
- → What decorations work well on these pops?
Jumbo nonpareils, sanding sugar, and piped candy details add texture and create spooky details like spider webs and legs.
- → How do I prevent the coating from melting off?
Chilling the cake balls thoroughly before dipping ensures the candy coating sets smoothly without melting the base.
- → What special equipment is helpful?
Lollipop sticks, Styrofoam blocks for drying, and a piping bag for decorations make assembly easier and neater.